Why a vintage cornstick pan browns unevenly after
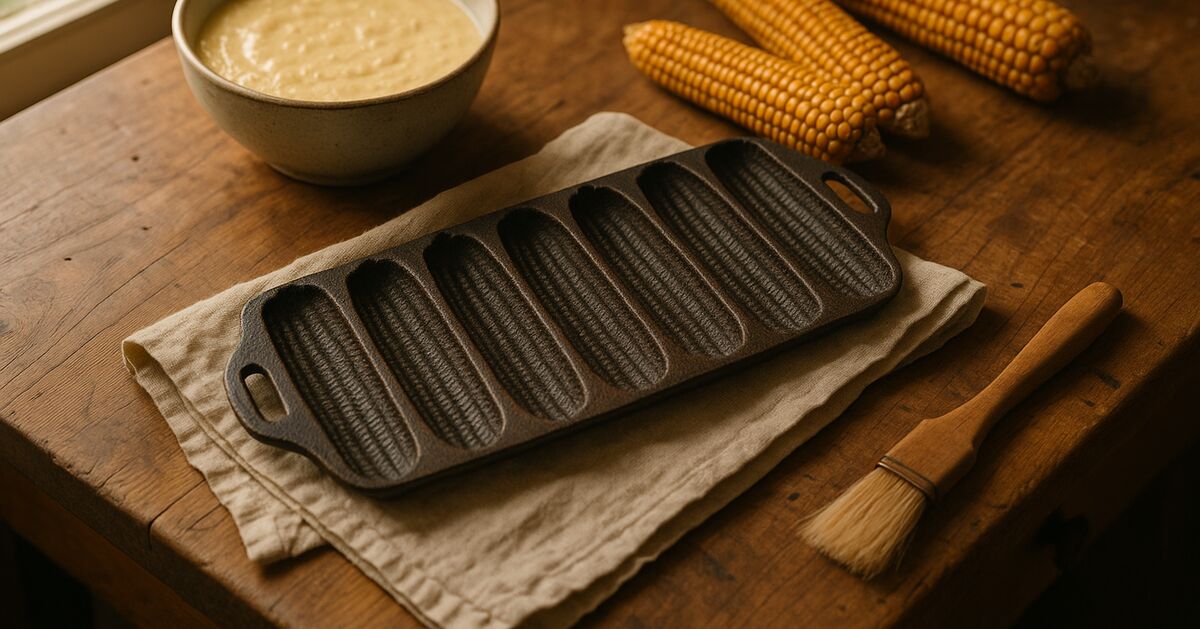
Perfectly restored cornstick pans that still produce pale, underdone sticks on one side of the mold and dark, almost-scorched ones on the other are genuinely frustrating - and the mismatch is not random. The iron is communicating something specific, and once you learn to read it, the fix becomes obvious.
This post walks through every major cause of uneven browning in vintage cornstick pans, in the order you should investigate them. Some causes live in the iron. Some live in your oven or stovetop. A few live in the seasoning layer itself. Knowing which is which saves you from chasing the wrong solution for weeks.
Why cornstick pans are especially prone to this problem
A standard skillet is one large, continuous casting. A cornstick pan is a collection of small, individually shaped cavities separated by thin webs of iron - often seven or eleven cavities, depending on the era and maker. That geometry creates several problems that a flat pan never has to deal with.
Thin webs conduct differently than thick bases. The iron between cavities is considerably thinner than the floor of each mold. Thin iron heats up quickly and also loses heat quickly. Thick iron takes longer to absorb heat but holds it more steadily. When you slide a cold pan into a hot oven, every section is racing to reach the same temperature, but they get there at different speeds. The sticks sitting over the thicker iron at the center of the pan may reach full baking temperature a minute or two before the sticks at the ends, which sit near more thin material and more exposed edge.
The ends of the pan cool faster. Basic physics: the ends of any metal object radiate heat from three sides rather than one, so they cool toward ambient temperature faster than the center. In a cornstick pan this effect is amplified because the end cavities are smaller in effective mass than the center ones.
Old iron is rarely perfectly flat. Decades of thermal cycling, sometimes a drop on a hard floor, occasionally a previous owner running a cold pan over a too-high burner - all of these can introduce a slight warp. A cornstick pan does not need much of a warp, maybe one or two millimeters across its length, to create a dramatic baking difference. The cavity that sits slightly proud of the oven rack loses contact with the heated surface; the one that presses down slightly gains it.
Step one: check the pan for warp
Set the pan on a known-flat surface - a granite countertop or the glass of your oven door works well. Press gently on each corner and each end. If any point rocks, you have warp. Then set the pan upside down and repeat. A cornstick pan that rocks even slightly will bake unevenly regardless of how careful you are with everything else, because some cavities will sit closer to the heat source than others.
Minor warp in vintage cornstick pans is extremely common. The older the pan, the more thermal cycles it has been through. Pans we see coming in from estates in Newfane, Grafton, and the surrounding hill towns of southern Vermont have frequently been through a century of wood-stove cooking, which cycles iron through a much wider temperature range than a modern gas or electric oven. That history leaves marks.
Can warp be corrected? Sometimes, with very careful and controlled application of heat and pressure. This is not a home repair, though. Attempting to re-flatten an already-stressed vintage casting by pressing or hammering it cold is a reliable way to crack it. If warp is your diagnosis, our restoration services include an evaluation of whether the pan is a good candidate for flattening or whether the better answer is to adapt your baking technique to compensate.
Step two: examine the seasoning layer cavity by cavity
After a full strip and re-season, all the cavities should look the same. If they do not - if some look darker, shinier, or more matte than others - the seasoning itself is contributing to the uneven browning.
A thicker seasoning layer is a better insulator. This sounds counterintuitive, but seasoning is not iron; it is polymerized oil, and polymerized oil does not conduct heat nearly as well as iron does. A cavity with three or four heavy seasoning layers will transfer heat to the batter more slowly than a cavity with one thin, well-bonded layer. The result is a paler stick that needs more time, while the lightly seasoned cavity next to it produces a deeply browned stick in the same window.
This is one reason experienced restorers apply seasoning in thin coats and buff off the excess aggressively before each cure. A cornstick pan with beautiful, thick, glossy black seasoning may actually be fighting itself. The goal is thin, hard, and even - not thick and dramatic-looking.
Check each cavity for pooling. The ear tips of the corn mold are the lowest points in the casting, and they are where excess oil migrates if you apply too much. If you see a slightly raised, slightly sticky patch at the tip of some cavities and not others, that is pooled and under-cured oil acting as an insulating pad right where you want the most reliable heat transfer.
For a deeper look at how stripping methods affect the iron surface that seasoning bonds to, the post on lye, electrolysis, and the self-cleaning oven covers exactly why the condition of the bare metal matters so much before the first seasoning coat goes on.
Step three: consider the iron's original surface condition
Restoration brings a pan back to a safe, functional, and well-seasoned state. It does not, and cannot, make the iron itself uniform if the iron was not uniform to begin with.
Cast iron from the late nineteenth and early twentieth centuries is generally believed to have varied in quality, sometimes even from the same foundry. Inclusions - small pockets of slag, carbon clustering, or porosity from a pour that cooled too fast - create spots in the iron that conduct heat differently from the surrounding metal. You cannot see these inclusions on the surface, but you can sometimes infer them from a pattern of browning that does not correspond to any cavity position, warp, or seasoning explanation.
If the same two or three cavities consistently produce pale or dark sticks regardless of orientation, and the pan is flat, and the seasoning looks even, you are likely dealing with variation in the iron itself. This is not a defect in the restoration - it is a characteristic of the casting. The fix is not more stripping or more seasoning. The fix is knowing which cavities run hot and which run cool, and filling the pan accordingly (more on that below).
Pans from makers like Griswold or Wagner are often said to have more consistent iron quality, reportedly due to tighter foundry controls. Generic and regional pans, including many that turn up at antique shops in Brattleboro, Bellows Falls, and Wilmington, can vary more. If you want to explore how foundry differences actually show up in cooking performance, the post on Griswold, Wagner, and Erie goes into that history in some detail.
Step four: look at your heat source
The pan may be perfectly flat, evenly seasoned, and made of consistent iron, and you may still get uneven browning if the heat source is not even.
Electric ovens are the main culprit here. Many home electric ovens have a single bottom element, and in most cases that element is not equidistant from every point on the rack. The area directly above the element runs hotter than the corners of the oven. A cornstick pan placed lengthwise over the element will have its center cavities sitting above more heat than the end ones.
Gas ovens often create a different pattern: burner ports are commonly arranged in a ring at the bottom, which can leave a hotter ring and a cooler center at rack level. Depending on where your pan sits, this can exaggerate or cancel out the pan's own edge-cooling tendency.
A simple test: bake one batch with the pan oriented north-south on the rack, and the next batch with it rotated ninety degrees. If the pale and dark sticks shift with the pan's orientation relative to the oven, the heat source is the driver. If the same cavities produce the same color regardless of orientation, the problem is in the pan.
Stovetop preheating is a different situation entirely. Many experienced cornbread bakers preheat their cornstick pan on a burner before adding batter, on the theory that a hot pan produces a crispier exterior. On a gas burner, though, a cornstick pan is often heated unevenly this way because the burner diameter is smaller than the pan and the flame does not reach the end cavities well. If you preheat on the stovetop, use the oven for the preheat instead - fifteen minutes at baking temperature with the pan already inside gives you far more even starting heat.
What the iron is telling you: reading the pattern
Put all of this together, and the browning pattern on your finished sticks is actually a diagnostic map.
- End cavities pale, center cavities dark: Classic heat-source unevenness or pan warp that lifts the ends away from the rack. Try oven preheating and rotating the pan halfway through the bake.
- One side of every cavity darker than the other: Warp that tilts the pan, or a hot spot in the oven to one side. Test with the oven rotation method above.
- Random cavities pale or dark with no positional pattern: Iron variability or uneven seasoning thickness. Strip and re-season with very thin coats, and note which cavities run different after the fix.
- Tips of the corn ears consistently pale: Pooled seasoning at the low points of the mold. Re-season with less oil and wipe more aggressively before curing.
- Every stick pale on the bottom, well-browned on the sides: Too much seasoning overall acting as insulation, or oven temperature lower than the dial indicates. Check with an oven thermometer.
Practical adjustments that help immediately
While you are diagnosing, a few practical steps reduce the unevenness right now.
Preheat the pan in the oven for at least fifteen minutes before adding batter. This gives the slower-heating sections time to catch up. Do not pull a cold cornstick pan from the cupboard and pour batter directly in - that is the single most reliable way to maximize the temperature difference between cavities.
Fill all cavities to the same level. A cavity that is two-thirds full will finish faster than one that is nearly full, not because of the iron but because there is simply less mass to cook through. Use a small measuring cup or a squeeze bottle to keep the fill level consistent.
Rotate the pan one hundred eighty degrees halfway through the bake. This is especially effective if the heat-source test reveals that oven position is the main driver.
Accept that some vintage pans have personality. A pan that runs slightly hot in the center and cool at the ends can become predictable once you know it. Fill the end cavities a little fuller, pull the pan when the center cavities are just right, and let the end cavities ride another minute. This is not failure - it is knowing your equipment.
When to ask for a professional evaluation
If you have worked through all of the above and the browning is still dramatically uneven, or if you suspect warp, it makes sense to have someone look at the pan before you invest more time seasoning and testing. We work with pans brought in from all over the region, including Athens, Putney, Dover, and the smaller towns like Brookline and Guilford where these old pans turn up in barns and estate sales fairly regularly.
You can learn more about what we do and how we approach a restoration, or browse all the areas we serve to see if we cover your town. The FAQ page also covers common questions about what to expect from the evaluation process.
And if you are still reading because you love this kind of iron-nerd detail, the blog index has more posts in this vein - including a look at how to tell whether an old cast iron piece is worth restoring at all, which is often the first question worth asking before you spend time troubleshooting baking performance.
A vintage cornstick pan that browns unevenly is not broken. It is communicating. The pattern of light and dark sticks is a precise report on what the iron, the seasoning, and the heat source are doing in combination. Read it carefully, run the tests in order, and the right fix will usually make itself clear.
Sources & further reading
- Heat transfer properties of cast iron cookware (National Institute of Standards and Technology (NIST))
- Oven temperature accuracy and calibration guidance for home ovens (U.S. Department of Energy)
- Thermal conductivity of metals and alloys reference data (National Institute of Standards and Technology (NIST))
- Food safety and cookware materials overview (U.S. Food and Drug Administration)
Revision history (1)
- Sep 9, 2026 - Pre-publish editorial QA: 1 flagged, 1 softened; claim audit: 7 claims, 4 rewritten
Claim-by-claim audit (7 checked)
- “Thin iron heats up quickly and also loses heat quickly. Thick iron takes longer to absorb heat but holds it more steadily.” (reasoning shown in the article)
- “Basic physics: the ends of any metal object radiate heat from three sides rather than one, so they cool toward ambient temperature faster than the center.” (reasoning shown in the article)
- “A thicker seasoning layer is a better insulator.” (reasoning shown in the article)
- “Many home electric ovens have a single bottom element, and in most cases that element is not equidistant from every point on the rack.” (rewritten to what the article can stand behind)
- “Gas ovens often create a different pattern: burner ports are commonly arranged in a ring at the bottom, which can leave a hotter ring and a cooler center at rack level.” (rewritten to what the article can stand behind)
- “Cast iron from the late nineteenth and early twentieth centuries is generally believed to have varied in quality, sometimes even from the same foundry.” (rewritten to what the article can stand behind)
- “Pans from makers like Griswold or Wagner are often said to have more consistent iron quality, reportedly due to tighter foundry controls.” (rewritten to what the article can stand behind)
Start a restoration
Tell us what you have
Send a couple of photos and the markings you can read on the bottom. We will tell you what the piece is, what it needs, and what it costs before anything ships. Identification and assessment are free, and stay free if you decide to do nothing.
Would rather just talk it through? (802) 348-1550